

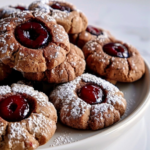
Meet your new favorite cookie: Black Forest Thumbprint Cookies! Imagine a rich, fudge-like chocolate cookie with a glowing ruby cherry center, finished with a delicate snowy dusting of powdered sugar. These cookies perfectly capture the decadent, classic flavors of Black Forest cake but in a cute, handheld treat. Whether you’re looking for a festive holiday tray addition or simply want to surprise your friends with something unexpected and delightful, Black Forest Thumbprint Cookies are guaranteed to steal the spotlight!

Ingredients You’ll Need
The beauty of these cookies is how just a few pantry staples, when combined thoughtfully, bring all the drama and flavor you crave. Each ingredient plays a key part, from buttery richness to bittersweet cocoa, and that signature cherry pop.
- Unsalted butter (1/2 cup, softened): Gives the cookies a rich, melt-in-your-mouth texture and holds everything together beautifully.
- Granulated sugar (1/4 cup): Adds sweetness and helps achieve those crisp edges every great cookie needs.
- Packed light brown sugar (1/4 cup): Deepens the flavor and adds moisture that makes the cookies ultra-soft inside.
- Large egg yolk: Adds extra richness, binding the dough for a tender bite.
- Vanilla extract (1 tsp): Enhances both the chocolate and cherry flavors—don’t skip it!
- All-purpose flour (1/2 cup): The backbone of your dough, giving the cookies structure while keeping them soft.
- Unsweetened cocoa powder (1/4 cup): Provides deep chocolatey notes reminiscent of the namesake cake.
- Baking soda (1/4 tsp): Ensures your cookies bake up soft but not flat.
- Salt (1/4 tsp): Balances the sweetness and intensifies the cocoa and cherry flavors.
- Cherry preserves (1/4 cup): Delivers the Black Forest “wow factor” with tart, jammy fruitiness right in the center.
- Powdered sugar (for dusting): A light dusting transforms the cookies into tiny winter wonderlands—totally irresistible!
How to Make Black Forest Thumbprint Cookies
Step 1: Cream Your Butter and Sugars
Start by preheating your oven to 350°F (175°C) and lining a baking sheet with parchment paper (trust me, this will make cleanup a breeze). In a mixing bowl, beat together the softened butter, granulated sugar, and brown sugar until the mixture is light and fluffy. This airiness is what gives your Black Forest Thumbprint Cookies their beautiful, tender crumb.
Step 2: Add Egg Yolk and Vanilla
Drop in the egg yolk and vanilla extract, mixing thoroughly until everything is silky and well incorporated. The egg yolk infuses the dough with rich flavor, while vanilla amps up all the decadent notes you love in a Black Forest treat.
Step 3: Whisk Dry Ingredients
In a separate bowl, whisk together the flour, cocoa powder, baking soda, and salt. This step makes sure the cocoa is distributed evenly, ensuring every bite of your Black Forest Thumbprint Cookies is chocolatey perfection.
Step 4: Form the Dough
Gradually add your dry ingredients to the butter mixture. Mix just until a soft, cohesive dough forms. Don’t overmix! Overworked dough can lead to tough cookies, and we want these to be as tender as possible.
Step 5: Shape and Fill the Cookies
Scoop out 1-inch balls of dough and arrange them on your prepared baking sheet, leaving a little space between each. With clean thumbs (or the back of a spoon), gently press into the center of each ball to make a small well. Then, spoon about 1/2 teaspoon of cherry preserves into each indentation—this is where the magic happens and gives these cookies their signature Black Forest twist.
Step 6: Bake
Bake for 10 to 12 minutes until the cookies are set around the edges but still slightly soft in the center. Don’t be tempted to overbake—these cookies will continue to firm up as they cool on the pan.
Step 7: Cool and Dust with Powdered Sugar
Allow your Black Forest Thumbprint Cookies to cool on the pan for five minutes, then transfer to a wire rack to cool completely. Once they’ve cooled, gently dust them with powdered sugar. The snowy finish not only looks beautiful but adds a whisper of sweetness, perfectly tying together the chocolate and cherry flavors.
How to Serve Black Forest Thumbprint Cookies

Garnishes
If you want to make your Black Forest Thumbprint Cookies extra special for a party or gift, consider adding a tiny chocolate curl or a sliver of fresh cherry on top right after dusting with powdered sugar. The contrast is stunning and makes them look bakery-worthy.
Side Dishes
These cookies shine with a cup of strong coffee, hot chocolate, or even a glass of milk. For a grown-up touch, serve them with a scoop of vanilla ice cream or a dollop of whipped cream—it turns an afternoon snack into a dreamy dessert experience.
Creative Ways to Present
Arrange your Black Forest Thumbprint Cookies in a rustic tin lined with parchment for a homemade gift, or stack them on a pretty cake stand with plenty of powdered sugar for an eye-catching display. For an extra festive touch, alternate with chocolate-dipped cherries or other cookies that echo the theme.
Make Ahead and Storage
Storing Leftovers
Keep your cookies fresh by storing them in an airtight container at room temperature for up to four days. Place parchment between layers to prevent any sticking or smudging of that gorgeous cherry center and powdered sugar topping.
Freezing
You can absolutely freeze Black Forest Thumbprint Cookies! Arrange the baked and cooled cookies (sans powdered sugar) in a single layer on a baking sheet until frozen, then transfer to a zip-top freezer bag. They’ll stay fabulous for up to two months. Dust with fresh powdered sugar after thawing to restore their charm.
Reheating
If you like your cookies warm, just pop them on a plate and microwave for about 8–10 seconds. The filling softens beautifully, and the chocolatey aroma will fill your kitchen all over again. Remember to re-dust with powdered sugar if needed.
FAQs
Can I use another kind of fruit preserve?
Absolutely! While cherry is classic for Black Forest Thumbprint Cookies, raspberry or blackberry preserves are delicious alternatives. Each fruit adds its own unique twist, but cherry preserves remain the ultimate for that signature flavor.
Is it necessary to use a separate egg yolk?
Yes, using just the yolk gives your cookies a richer, more tender crumb. The yolk adds moisture and fat, ensuring each bite of your Black Forest Thumbprint Cookies is perfectly soft inside.
Can I double the recipe?
Go right ahead! This recipe doubles beautifully—just be sure to space out your cookies on the sheet, and you may need to rotate your pans if baking multiple trays at once.
Can I make the dough ahead of time?
Absolutely. You can prepare the dough and refrigerate it for up to two days before baking. Just let it sit out for about 20 minutes to soften before shaping and filling.
My dough seems sticky—is that okay?
A slightly sticky dough is totally fine and helps create that fudgy, soft bite. If it’s too difficult to handle, chill it for 20-30 minutes in the fridge and it will become much easier to shape.
Final Thoughts
I hope you’ll feel inspired to whip up a batch of Black Forest Thumbprint Cookies soon. They’re a charming twist on a beloved classic, sure to surprise and delight anyone lucky enough to try them. Happy baking!
Print
Black Forest Thumbprint Cookies Recipe
- Prep Time: 15 minutes
- Cook Time: 12 minutes
- Total Time: 27 minutes
- Yield: 18 cookies 1x
- Category: Desserts
- Method: Baking
- Cuisine: European-inspired
- Diet: Vegetarian
Description
These Black Forest Thumbprint Cookies combine fudgy chocolate cookie bases with luscious cherry preserves in the center, then finish with a dusting of powdered sugar. Inspired by the flavors of the classic Black Forest cake, these cookies are irresistible for chocolate and cherry lovers alike, making them perfect for holidays, sharing, or a sweet treat any day.
Ingredients
For the Chocolate Cookie Dough:
- 1/2 cup (113g) unsalted butter, softened
- 1/4 cup (50g) granulated sugar
- 1/4 cup (55g) packed light brown sugar
- 1 large egg yolk
- 1 tsp vanilla extract
- 1/2 cup (65g) all-purpose flour
- 1/4 cup (20g) unsweetened cocoa powder
- 1/4 tsp baking soda
- 1/4 tsp salt
For the Filling & Finishing:
- 1/4 cup cherry preserves
- Powdered sugar, for dusting
Instructions
- Prepare Oven and Baking Sheet: Preheat your oven to 350°F (175°C). Line a baking sheet with parchment paper to prevent sticking and set it aside.
- Cream Butter and Sugars: In a mixing bowl, cream together the softened butter, granulated sugar, and brown sugar until the mixture is light and fluffy. This creates a tender cookie texture.
- Add Egg Yolk and Vanilla: Beat in the egg yolk and vanilla extract to the creamed mixture until well incorporated. The egg yolk adds richness and helps bind the dough.
- Mix Dry Ingredients: In a separate bowl, whisk together the all-purpose flour, unsweetened cocoa powder, baking soda, and salt to ensure even distribution of the leavening and cocoa.
- Combine Wet and Dry Ingredients: Gradually add the dry ingredients to the wet mixture, mixing until a cohesive dough forms. The dough should hold together and be fudgy but not sticky.
- Shape Cookies: Scoop out 1-inch balls of dough and place them evenly spaced on the prepared baking sheet. Leave room for slight spreading.
- Create Thumbprints: Using your thumb or the back of a spoon, gently press an indentation into the center of each dough ball to form a well for the cherry preserves.
- Add Cherry Preserves: Fill each indentation with about 1/2 teaspoon of cherry preserves. Do not overfill, as the preserves may spread while baking.
- Bake: Place the cookies in the preheated oven and bake for 10–12 minutes, or until the cookies look set but are still soft in the center.
- Cool: Allow the cookies to cool on the baking sheet for 5 minutes before carefully transferring them to a wire rack to cool completely. This helps them set without breaking.
- Finish with Powdered Sugar: Once the cookies are fully cooled, lightly dust them with powdered sugar for an elegant and classic finish.
Notes
- If your cherry preserves are chunky, you can chop larger pieces for easier filling.
- Store cookies in an airtight container at room temperature for up to 4 days.
- Try swapping cherry preserves for raspberry or strawberry for a flavor twist.
- If the dough is too soft to handle, chill it in the refrigerator for 15-20 minutes before shaping.
- For extra chocolate flavor, add mini chocolate chips to the dough before shaping.
Nutrition
- Serving Size: 1 cookie
- Calories: 140
- Sugar: 8g
- Sodium: 60mg
- Fat: 7g
- Saturated Fat: 4g
- Unsaturated Fat: 2.5g
- Trans Fat: 0g
- Carbohydrates: 19g
- Fiber: 1g
- Protein: 1g
- Cholesterol: 25mg
Your email address will not be published. Required fields are marked *