

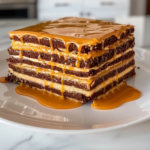
Bright, cheerful, and impossibly easy, these No-Bake Peanut Butter Granola Cups are the answer to your snacking dreams. Imagine creamy, salty-sweet peanut butter nestled inside a sturdy, oat-packed granola shell, all made in under an hour—without ever turning on your oven. Whether you need a quick midday pick-me-up, a healthy bite to keep you fueled on-the-go, or a treat to tuck into lunchboxes, this recipe is a surefire hit. The best part? You’re likely to have everything you need already in your pantry!

Ingredients You’ll Need
Every ingredient in these No-Bake Peanut Butter Granola Cups pulls its weight, adding to the satisfying crunch, nutty richness, and subtle sweetness that makes these so craveable. You can even play around with the optional toppings to make them just how you like.
- Rolled Oats: These are the backbone of each cup, creating a hearty base that holds everything together and brings wonderful texture.
- Peanut Butter: Opt for creamy for smooth cups, or swap in chunky for added crunch—either way, it’s the star of the show.
- Honey or Maple Syrup: Adds just the right amount of sweetness and acts as a natural glue to bind the oats.
- Vanilla Extract: A splash of vanilla makes the flavors sing, giving that classic, comforting aroma.
- Salt: Just a pinch to make the other ingredients pop and balance out the sweetness.
- Chopped Nuts or Granola Clusters (optional): Scatter these on top for a touch of nutty crunch and eye-catching presentation.
How to Make No-Bake Peanut Butter Granola Cups
Step 1: Mix the Granola Base
Start by grabbing a roomy bowl and combining the rolled oats, peanut butter, honey or maple syrup, vanilla extract, and that essential pinch of salt. Mix everything together until you have a sticky, cohesive mixture. The oats should be well-coated and the mixture easy to press between your fingers. If your peanut butter is very thick or your oats seem a little dry, feel free to add a touch more honey or a splash of milk to bring it together.
Step 2: Shape into Cups
Scoop about two tablespoons of the mixture into each well of a mini muffin tin. Use your fingers (or the back of a spoon) to gently press the mixture down and up the sides, creating a mini cup with a little well in the center. This sets the stage for that dreamy peanut butter filling!
Step 3: Firm Up in the Freezer
Place the muffin tin in your freezer and let the cups chill for about 15 to 20 minutes. This quick blast of cold helps the mixture firm up, ensuring your cups hold their shape when filled.
Step 4: Fill with Creamy Peanut Butter
Once the granola cups feel set, take them out and add a small dollop of peanut butter right into the center of each. Let that creamy richness settle in—don’t be shy with the filling!
Step 5: Top and Set Again
For a little extra crunch and fun, sprinkle each cup with chopped nuts or a pinch of granola clusters. Then, return the pan to your fridge or freezer for another 15 minutes, giving the peanut butter and toppings a chance to firm up and work their magic.
Step 6: Release and Store
Gently pop the No-Bake Peanut Butter Granola Cups from the tin (a butter knife run around the edge makes this easy). Transfer to an airtight container and keep them chilled in the fridge. You’ll find yourself grabbing one every time you need a little pick-me-up!
How to Serve No-Bake Peanut Butter Granola Cups

Garnishes
Dress up your No-Bake Peanut Butter Granola Cups just before serving with a dusting of cocoa powder, a drizzle of extra melted peanut butter, a sprinkle of flaky sea salt, or a handful of fresh berries. These simple touches elevate each cup and make them feel like a special treat.
Side Dishes
Pair your granola cups with a tall glass of cold milk, a frothy cappuccino, or a bowl of fresh fruit for a balanced snack or mini breakfast. They’re also lovely alongside a fruit and yogurt parfait or as a sweet finish to a lunchbox spread.
Creative Ways to Present
Stack these petite treats on a tiered dessert platter, arrange them in pretty cupcake liners, or box them up for edible gift-giving. For parties or brunches, try arranging them around a bowl of yogurt dip or whipped cream for an interactive snack table that always gets rave reviews!
Make Ahead and Storage
Storing Leftovers
Keep leftover No-Bake Peanut Butter Granola Cups in an airtight container in the fridge, where they’ll stay fresh and delicious for up to a week. Their texture holds up beautifully, and the cool temperature keeps the peanut butter filling just the right amount of firm and creamy.
Freezing
If you want to make a big batch ahead of time, freeze the cups in a single layer on a baking sheet until solid, then transfer to a freezer-safe bag or container. Frozen cups can last up to two months. When you’re ready to enjoy, just thaw them in the fridge or at room temperature for a few minutes.
Reheating
No need to reheat these treats—they’re meant to be enjoyed cold or at room temperature. If you’d like a slightly softer texture, leave them out of the fridge for 10–15 minutes before serving.
FAQs
Can I use a different nut butter for these granola cups?
Absolutely! Almond butter, cashew butter, or even sunflower seed butter all work beautifully as substitutions for peanut butter, giving the classic No-Bake Peanut Butter Granola Cups a unique spin while keeping them just as delicious.
Are these granola cups gluten-free?
As long as you choose certified gluten-free oats, these No-Bake Peanut Butter Granola Cups are a naturally gluten-free snack, perfect for those avoiding wheat without sacrificing any flavor or texture.
Can I make these vegan?
Yes, you can make vegan No-Bake Peanut Butter Granola Cups by using maple syrup instead of honey and ensuring your chocolate or granola toppings are plant-based. They’re every bit as scrumptious!
What’s the best way to get the cups out of the muffin tin?
Let the cups chill thoroughly until they’re firm, then use a butter knife to gently loosen each one from the tin. Silicone muffin pans also work wonders for effortless release.
How long will these cups last?
When stored in the fridge in an airtight container, No-Bake Peanut Butter Granola Cups will stay delicious for up to a week. You can also freeze them for longer storage without compromising taste or texture.
Final Thoughts
If you’re ready to whip up a snack that’s as easy as it is irresistible, give these No-Bake Peanut Butter Granola Cups a go! They’re the kind of treat that ticks every box: satisfying, wholesome, quick to make, and just plain fun. Your future self will thank you every time you open the fridge and spot a batch ready to grab.

No-Bake Peanut Butter Granola Cups,
- Prep Time: 10 minutes
- Cook Time: 0 minutes
- Total Time: 40 minutes
- Yield: 12 cups 1x
- Category: Snacks
- Method: No-cook
- Cuisine: American
- Diet: Gluten Free
Description
No-Bake Peanut Butter Granola Cups are a quick and satisfying snack made without an oven. Creamy peanut butter is nestled in a crunchy oat and honey granola shell, then chilled for the perfect blend of chewy and crunchy textures. These wholesome, protein-packed bites are great for healthy snacking or a sweet treat any time of day.
Ingredients
Granola Shell
- 2 cups rolled oats
- 1/2 cup peanut butter
- 1/4 cup honey or maple syrup
- 1/2 tsp vanilla extract
- Pinch of salt
Filling & Topping
- Extra peanut butter (about 1/4 cup, for topping)
- 1/4 cup chopped nuts or granola clusters (optional, for garnish)
Instructions
- Mix the Base: In a large bowl, stir together the rolled oats, 1/2 cup peanut butter, honey (or maple syrup), vanilla extract, and a pinch of salt. Mix until everything is well-coated and the mixture is sticky and holds together when pressed.
- Form the Cups: Press about 2 tablespoons of the oat mixture into the bottom and sides of each cup in a mini muffin tin, shaping them to form little nests or cups. Make sure to press firmly so they hold together.
- Chill the Shells: Place the muffin tin in the freezer for 15–20 minutes to let the cups firm up. This helps maintain their shape when you add the filling.
- Add Peanut Butter: Take the muffin tin out of the freezer. Spoon a small dollop of extra peanut butter into the center of each chilled granola cup, spreading it slightly but keeping it inside the ‘nest’.
- Add Toppings: Sprinkle each cup with chopped nuts or extra granola clusters if desired, for added texture and visual appeal.
- Set the Cups: Return the muffin tin to the fridge or freezer for an additional 15 minutes, allowing everything to set firmly together.
- Unmold and Store: Carefully pop the chilled cups out of the muffin tin. Enjoy right away or store them in an airtight container in the fridge for up to a week.
Notes
- You can use almond butter or sunflower seed butter for nut-free or alternative flavors.
- Use gluten-free oats for a gluten-free snack.
- Spoon the granola mixture firmly into the pan so the cups hold together when chilled.
- Customize with chocolate chips, dried fruit, or seeds for extra flavor and nutrition.
- If sticky, lightly grease your hands or the muffin pan to prevent sticking.
Nutrition
- Serving Size: 1 cup
- Calories: 180
- Sugar: 6g
- Sodium: 60mg
- Fat: 10g
- Saturated Fat: 2g
- Unsaturated Fat: 7g
- Trans Fat: 0g
- Carbohydrates: 17g
- Fiber: 2g
- Protein: 5g
- Cholesterol: 0mg
Your email address will not be published. Required fields are marked *